1 Mac电脑设置
1.1 安装Command Line Tools
xcode-select --install
1.2 Git 入门
1.2.1 Github 使用
1.2.2 安装Git
1.2.3 Git配置
安装完成后,还需要最后一步设置,在命令行输入:
$ git config --global user.name "Your Name"
$ git config --global user.email "email@example.com"
1.2.4 本地仓库
git init 在本地创建一个Git仓库;
git add . 将项目添加到暂存区;
git commit -m “注释内容” 将项目提交到Git仓库;
1.2.5 远程仓库 Github
配置SSH (参考通过 SSH 连接到 GitHub)
Github使用SSH配置, 初始需要以下三个步骤
- 使用秘钥生成工具生成rsa秘钥和公钥
- 将rsa公钥添加到代码托管平台
- 将rsa秘钥添加到ssh-agent中,为ssh client指定使用的秘钥文件
具体操作如下:
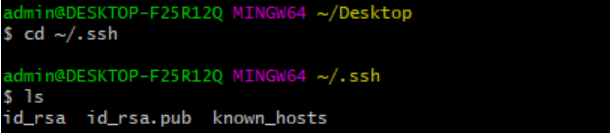
第一步:检查本地主机是否已经存在ssh key
cd ~/.ssh
ls ## 看是否存在 id_rsa 和 id_rsa.pub文件,如果存在,说明已经有SSH Key
如下图所示,则表明已经存在
如果存在,直接跳到第三步
第二步:生成ssh key 如果不存在ssh key,使用如下命令生成
ssh-keygen -t rsa -C "xxx@xxx.com"
//执行后一直回车即可
生成完以后再用第二步命令,查看ssh key
第三步:获取ssh key公钥内容(id_rsa.pub)
cd ~/.ssh
cat id_rsa.pub
如下图所示,复制该内容

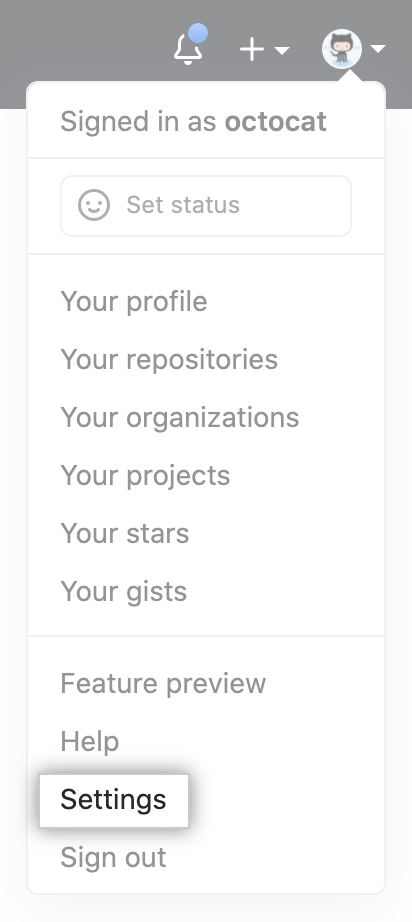
第四步:Github账号上添加公钥
进入Settings设置
添加ssh key,把刚才复制的内容粘贴上去保存即可
第五步:验证是否设置成功
ssh -T git@github.com
显示如下信息表明设置成功

设置成功后,即可不需要账号密码clone和push代码
注意之后在clone仓库的时候要使用ssh的url,而不是https!
1.2.6 验证原理
SSH登录安全性由非对称加密保证,产生密钥时,一次产生两个密钥,一个公钥,一个私钥,在git中一般命名为id_rsa.pub, id_rsa。
那么如何使用生成的一个私钥一个公钥进行验证呢?
本地生成一个密钥对,其中公钥放到远程主机,私钥保存在本地
当本地主机需要登录远程主机时,本地主机向远程主机发送一个登录请求,远程收到消息后,随机生成一个字符串并用公钥加密,发回给本地。本地拿到该字符串,用存放在本地的私钥进行解密,再次发送到远程,远程比对该解密后的字符串与源字符串是否等同,如果等同则认证成功。
1.2.7 通俗解释!!
重点来了:一定要知道ssh key的配置是针对每台主机的!,比如我在某台主机上操作git和我的远程仓库,想要push时不输入账号密码,走ssh协议,就需要配置ssh key,放上去的key是当前主机的ssh公钥。那么如果我换了一台其他主机,想要实现无密登录,也就需要重新配置。
下面解释开头提出的问题:
(1)为什么要配?
配了才能实现push代码的时候不需要反复输入自己的github账号密码,更方便
(2)每使用一台主机都要配?
是的,每使用一台新主机进行git远程操作,想要实现无密,都需要配置。并不是说每个账号配一次就够了,而是每一台主机都需要配。
(3)配了为啥就不用密码了?
因为配置的时候是把当前主机的公钥放到了你的github账号下,相当于当前主机和你的账号做了一个关联,你在这台主机上已经登录了你的账号,此时此刻github认为是该账号主人在操作这台主机,在配置ssh后就信任该主机了。所以下次在使用git的时候即使没有登录github,也能直接从本地push代码到远程了。当然这里不要混淆了,你不能随意push你的代码到任何仓库,你只能push到你自己的仓库或者其他你有权限的仓库!
利用 Github CLI 新建远程仓库(Repositories)
安装 Github CLI
gh 可以通过Homebrew, MacPorts, Conda, Spack等方式安装
Homebrew
Install: Upgrade: brew install ghbrew upgrade ghMacPorts
Install: Upgrade: sudo port install ghsudo port selfupdate && sudo port upgrade ghConda
Install: Upgrade: conda install gh --channel conda-forgeconda update gh --channel conda-forgeAdditional Conda installation options available on the gh-feedstock page.
Spack
Install: Upgrade: spack install ghspack uninstall gh && spack install ghGit CLI 登陆验证
生成 github token
Personal access tokens > Generate new token > Generate new token (classic) > Note (What’s this token for?) > Expiration > No Expiration > Select scopes > Select ‘repo’, ‘read:org’, ‘admin:public_key’
将上述生成的token复制保存以便后面使用
gh 登陆 github 验证
gh auth login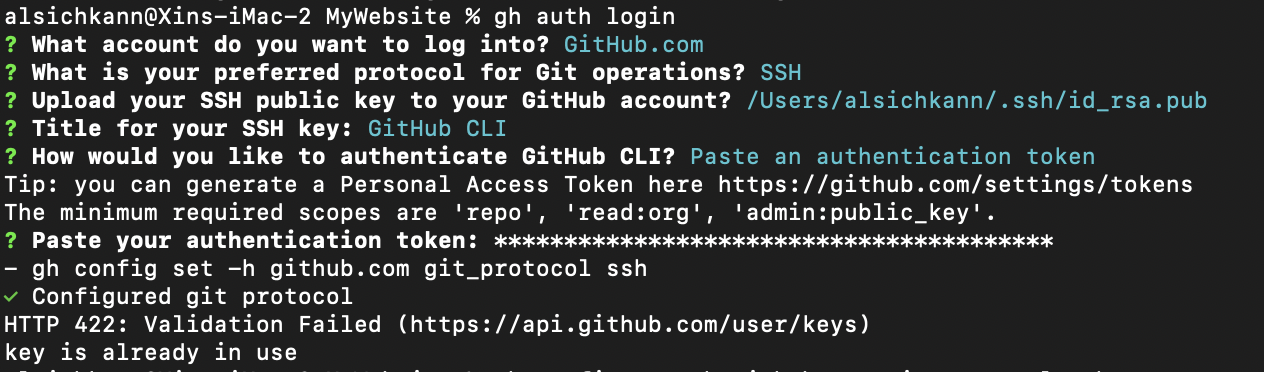
新建 github repo 并将当前项目推送至远程 github repo
gh repo create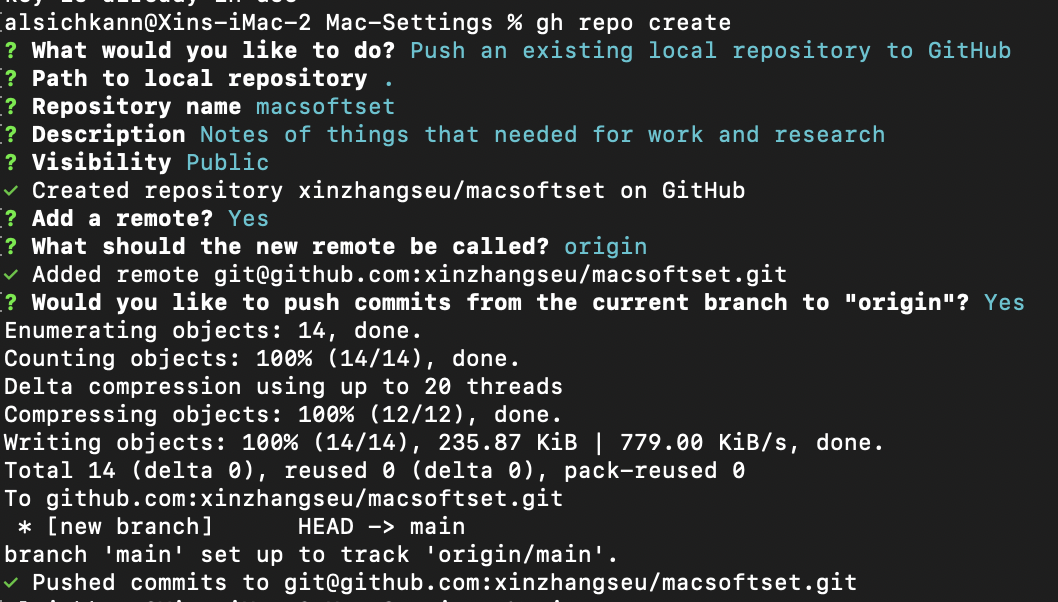
后续本地仓库修改推送至远程 github repo
git push origin main
1.3 利用 Git Action 发布 quarto 网页到 Netlify
GitHub Actions 是 GitHub 的持续集成服务。
Netlify 是静态网站自动部署平台,是目前比较简单的自动化部署方案。
部署静态网站到 Netlify 上有两种方法。
- 第一种是不用 GitHub actions,直接使用 netlify 连接到我们的GitHub仓库,netlify 会自动为我们设置好 CI/CD pipeline,只要我们 push 到相应的 branch 上,netlify 就会自动完成部署。我们也可以在 site setting 里对部署进行更多的设置。
- 第二种是不直接连接 Github repo 到 Netlify,用 GitHub Actions 设置CI/CD workflow。
1.3.1 为什么用 Github Actions
首先,Netlify 的免费额度一个月只有300分钟 build time,如果我们有多个部署环境,经常部署的话,这点时间可能不够用。如果使用 GitHub Actions,会有2000分钟的build time。其次,如果不使用 GitHub Actions,我们对 build process 没有什么选择,只能使用 Netlify 自带的设置,灵活性比较低。
1.3.2 使用 GitHub Actions 部署到 Netlify
主要有6步:
- 创建 Netlify site
- 获取
NETLIFY_AUTH_TOKEN和NETLIFY_SITE_ID - 设置 GitHub Repositories secrets
- 本地仓库设置 Quarto Publish
- 本地仓库设置 GitHub Actions
- 将本地仓库推送至 GitHub 远程仓库
第一步
首先,登陆 Netlify > Sites > Add new site > Deploy manually
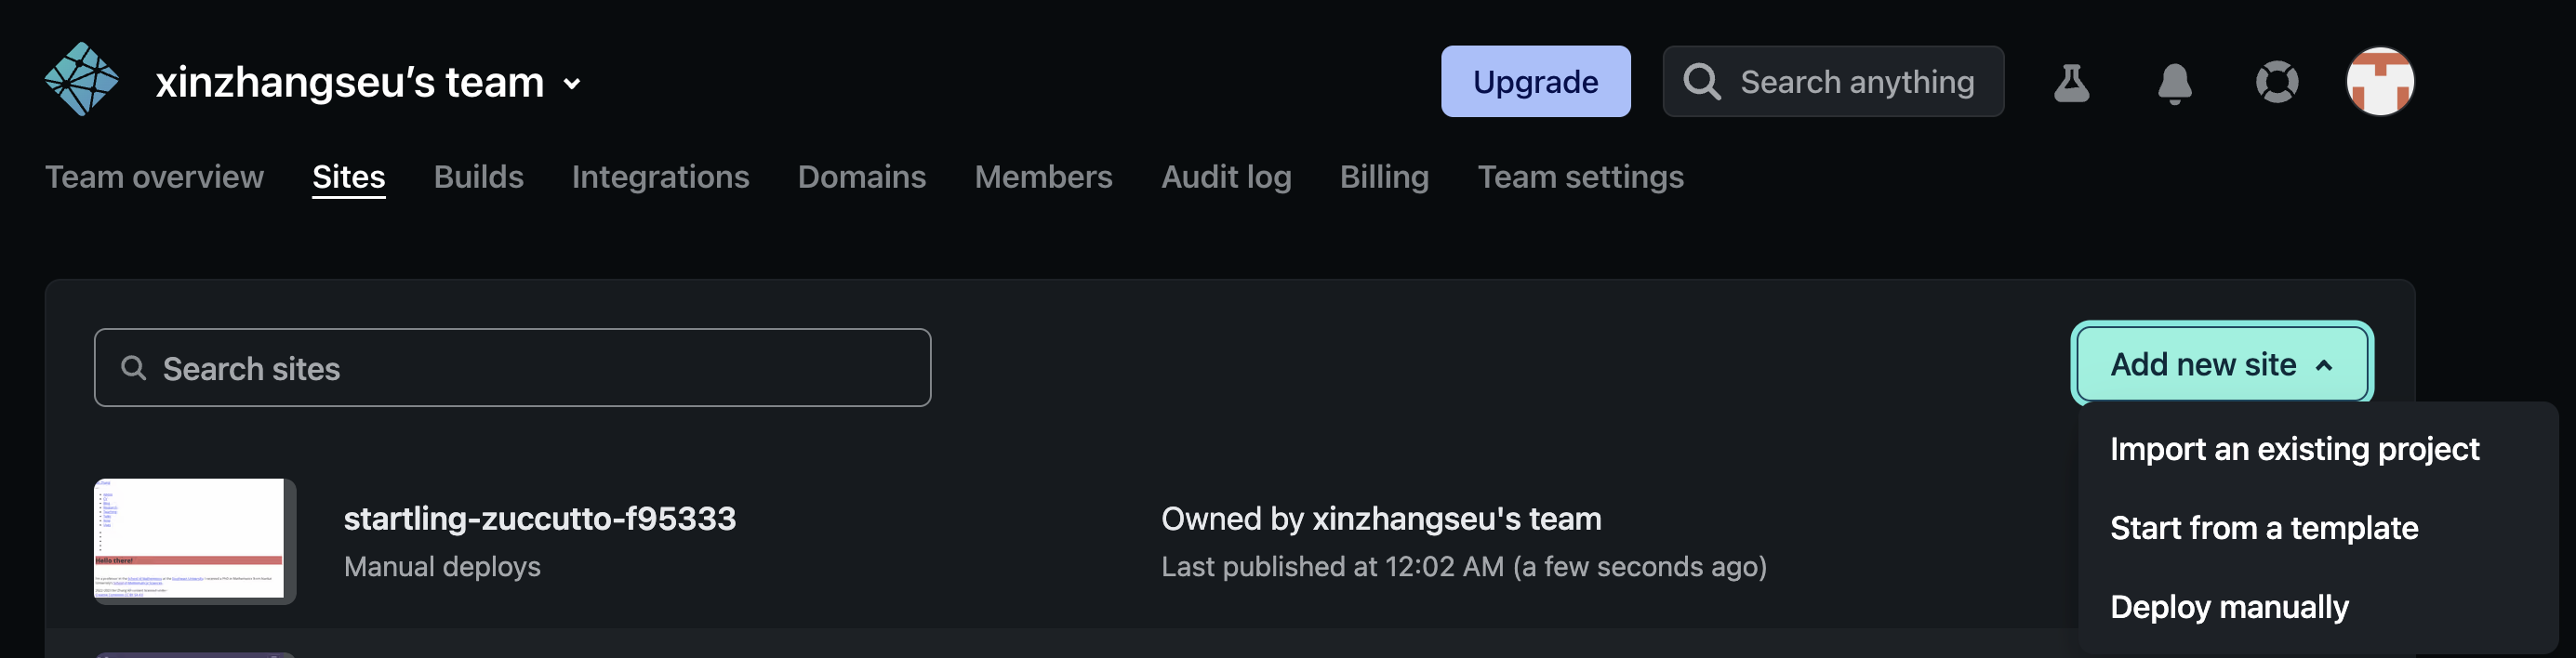
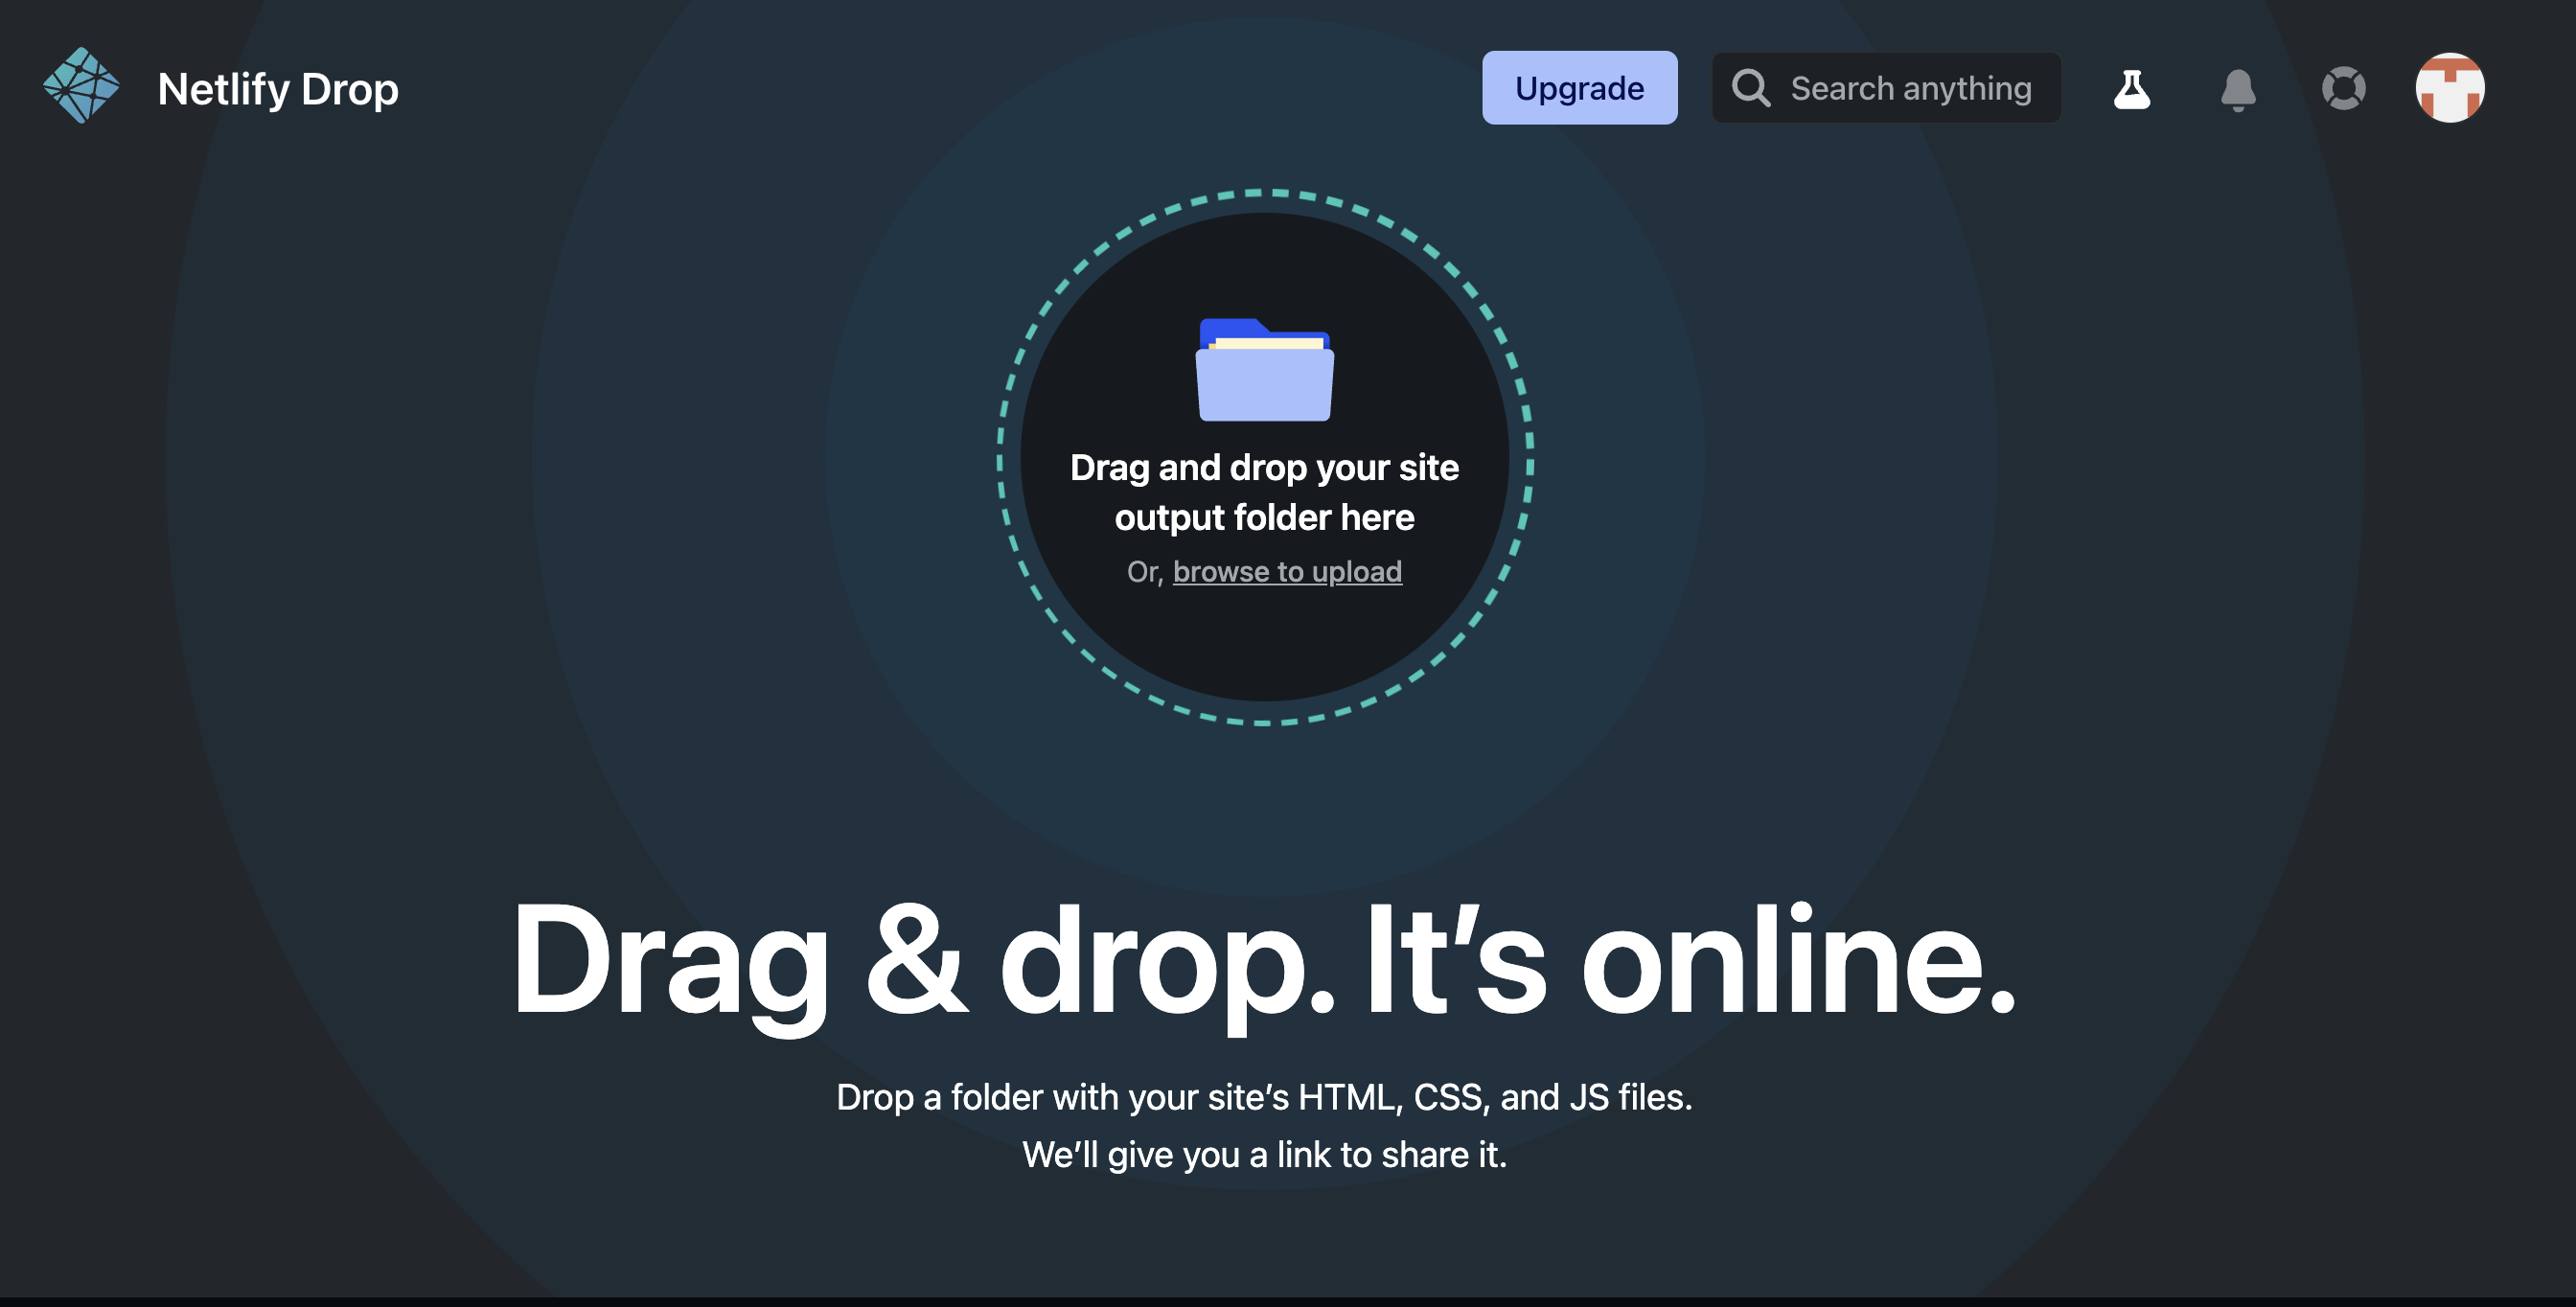
注意,这里不要点击 new site from Git,不要让 Netlify 直接连接到 GitHub。先拖拽一个空文件夹到上图虚线框里面,创建一个 Deploy manually Netlify Site,之后我们会通过 Github actions 上传我们的 build 到 Netlify。
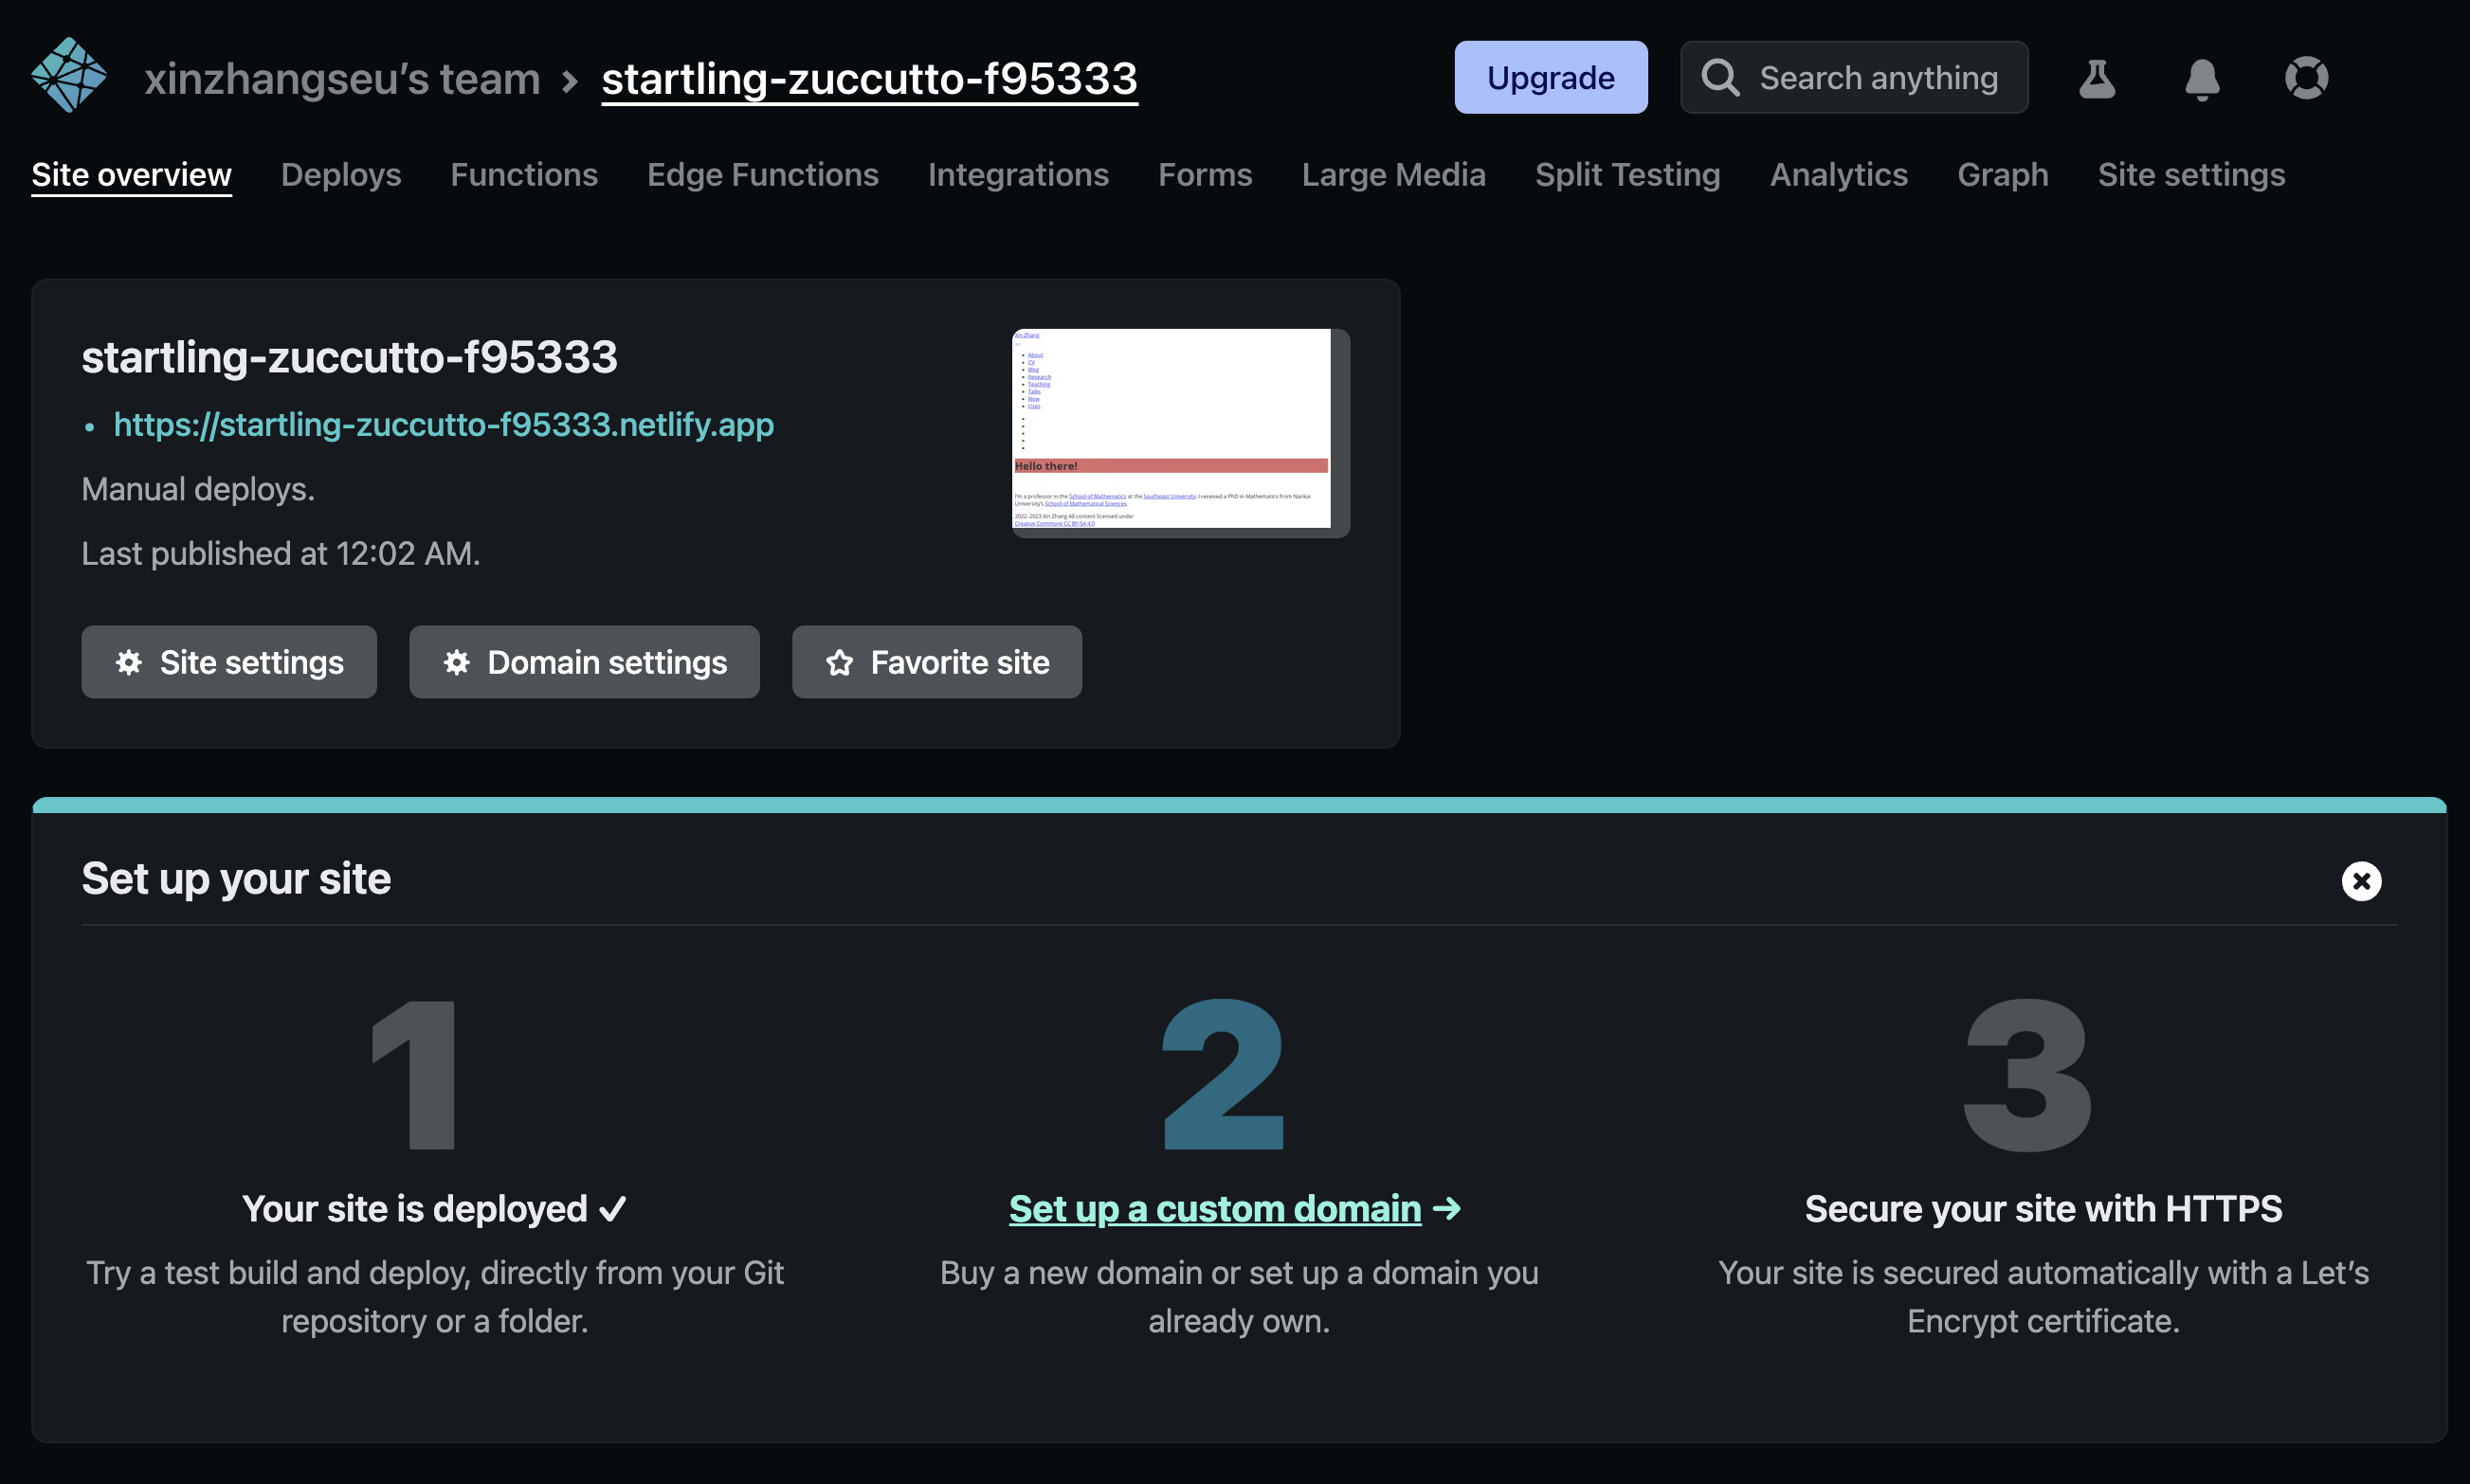
完成上传后,我么看到类似如下 Netlify Site 页面:
第二步
接下来,需要获取发布到 Netlify 所需的两个凭据并配置 GitHub Action.
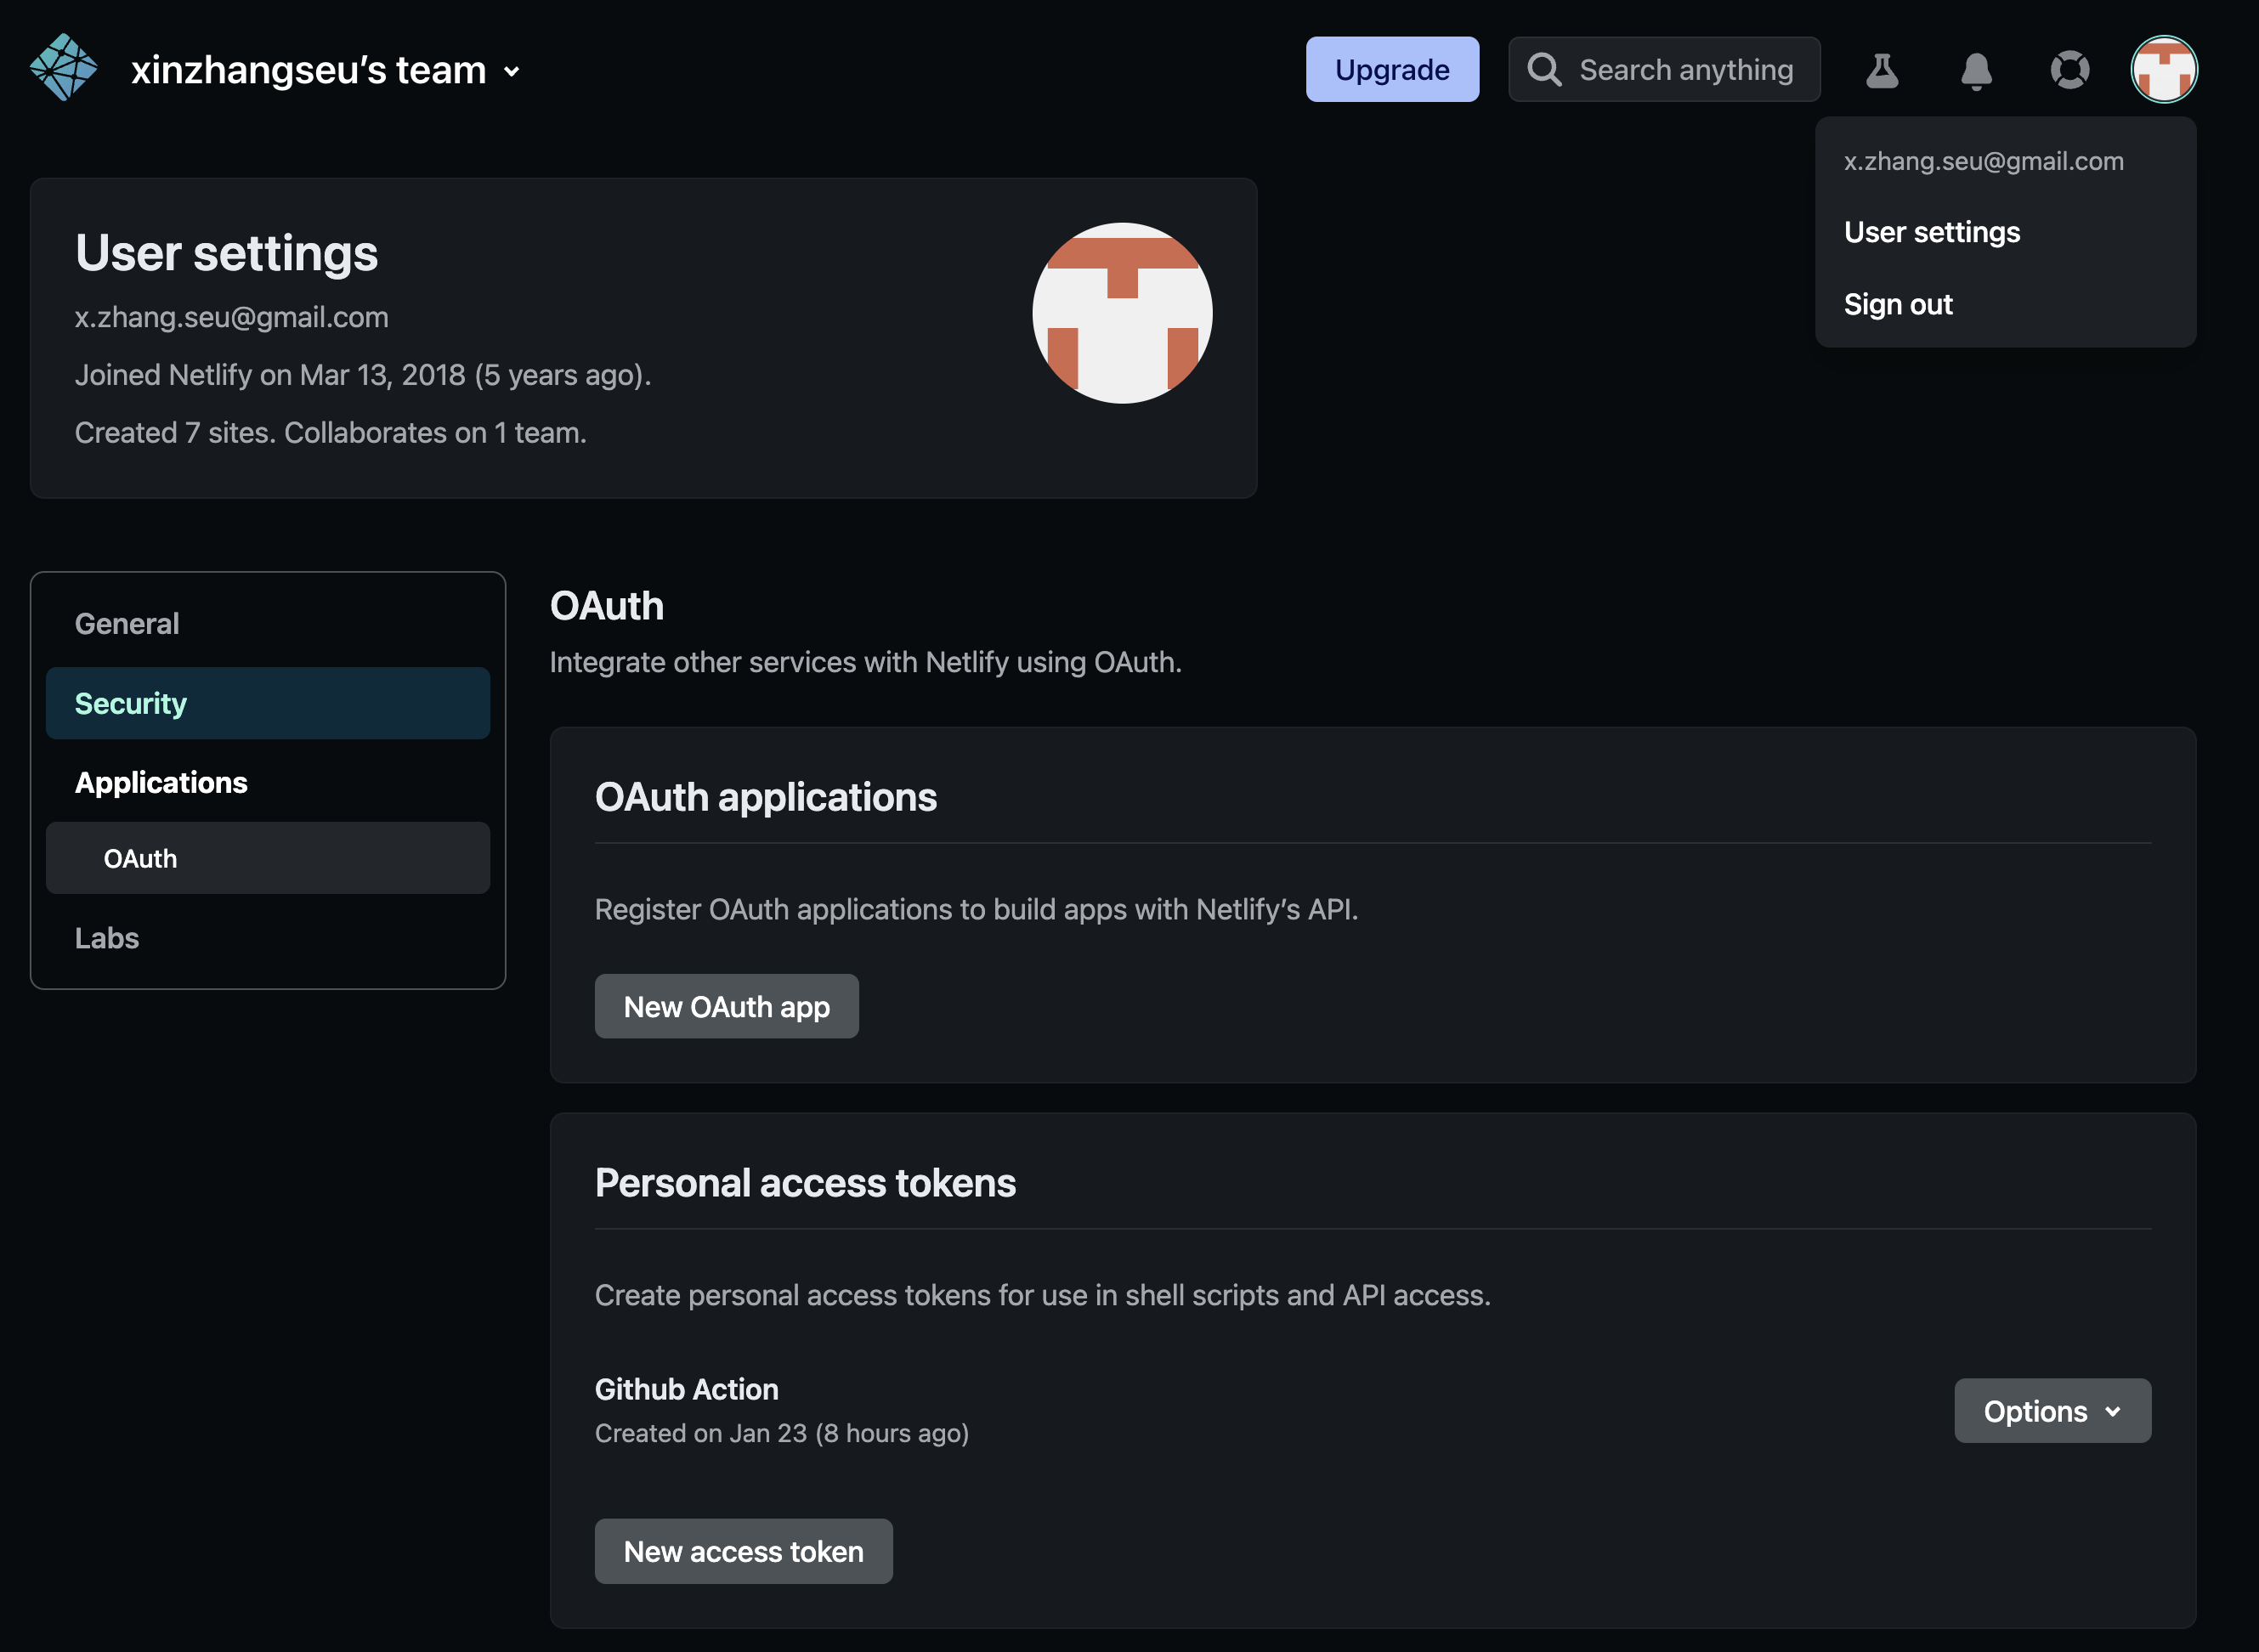
第一个是 NETLIFY_AUTH_TOKEN,在 Netlify 页面右上角点击 User settings > Applications > Personal access tokens 中点击 New access token,创建之后先不要关闭这个页面,等下要复制粘贴。
第二个是 NETLIFY_SITE_ID,在第一步生成的 Neilify Site 页面最右侧上方点击Site settings,然后可以看到在 Site Information 下面有一个 Site ID 就是我们需要的 NETLIFY_SITE_ID。
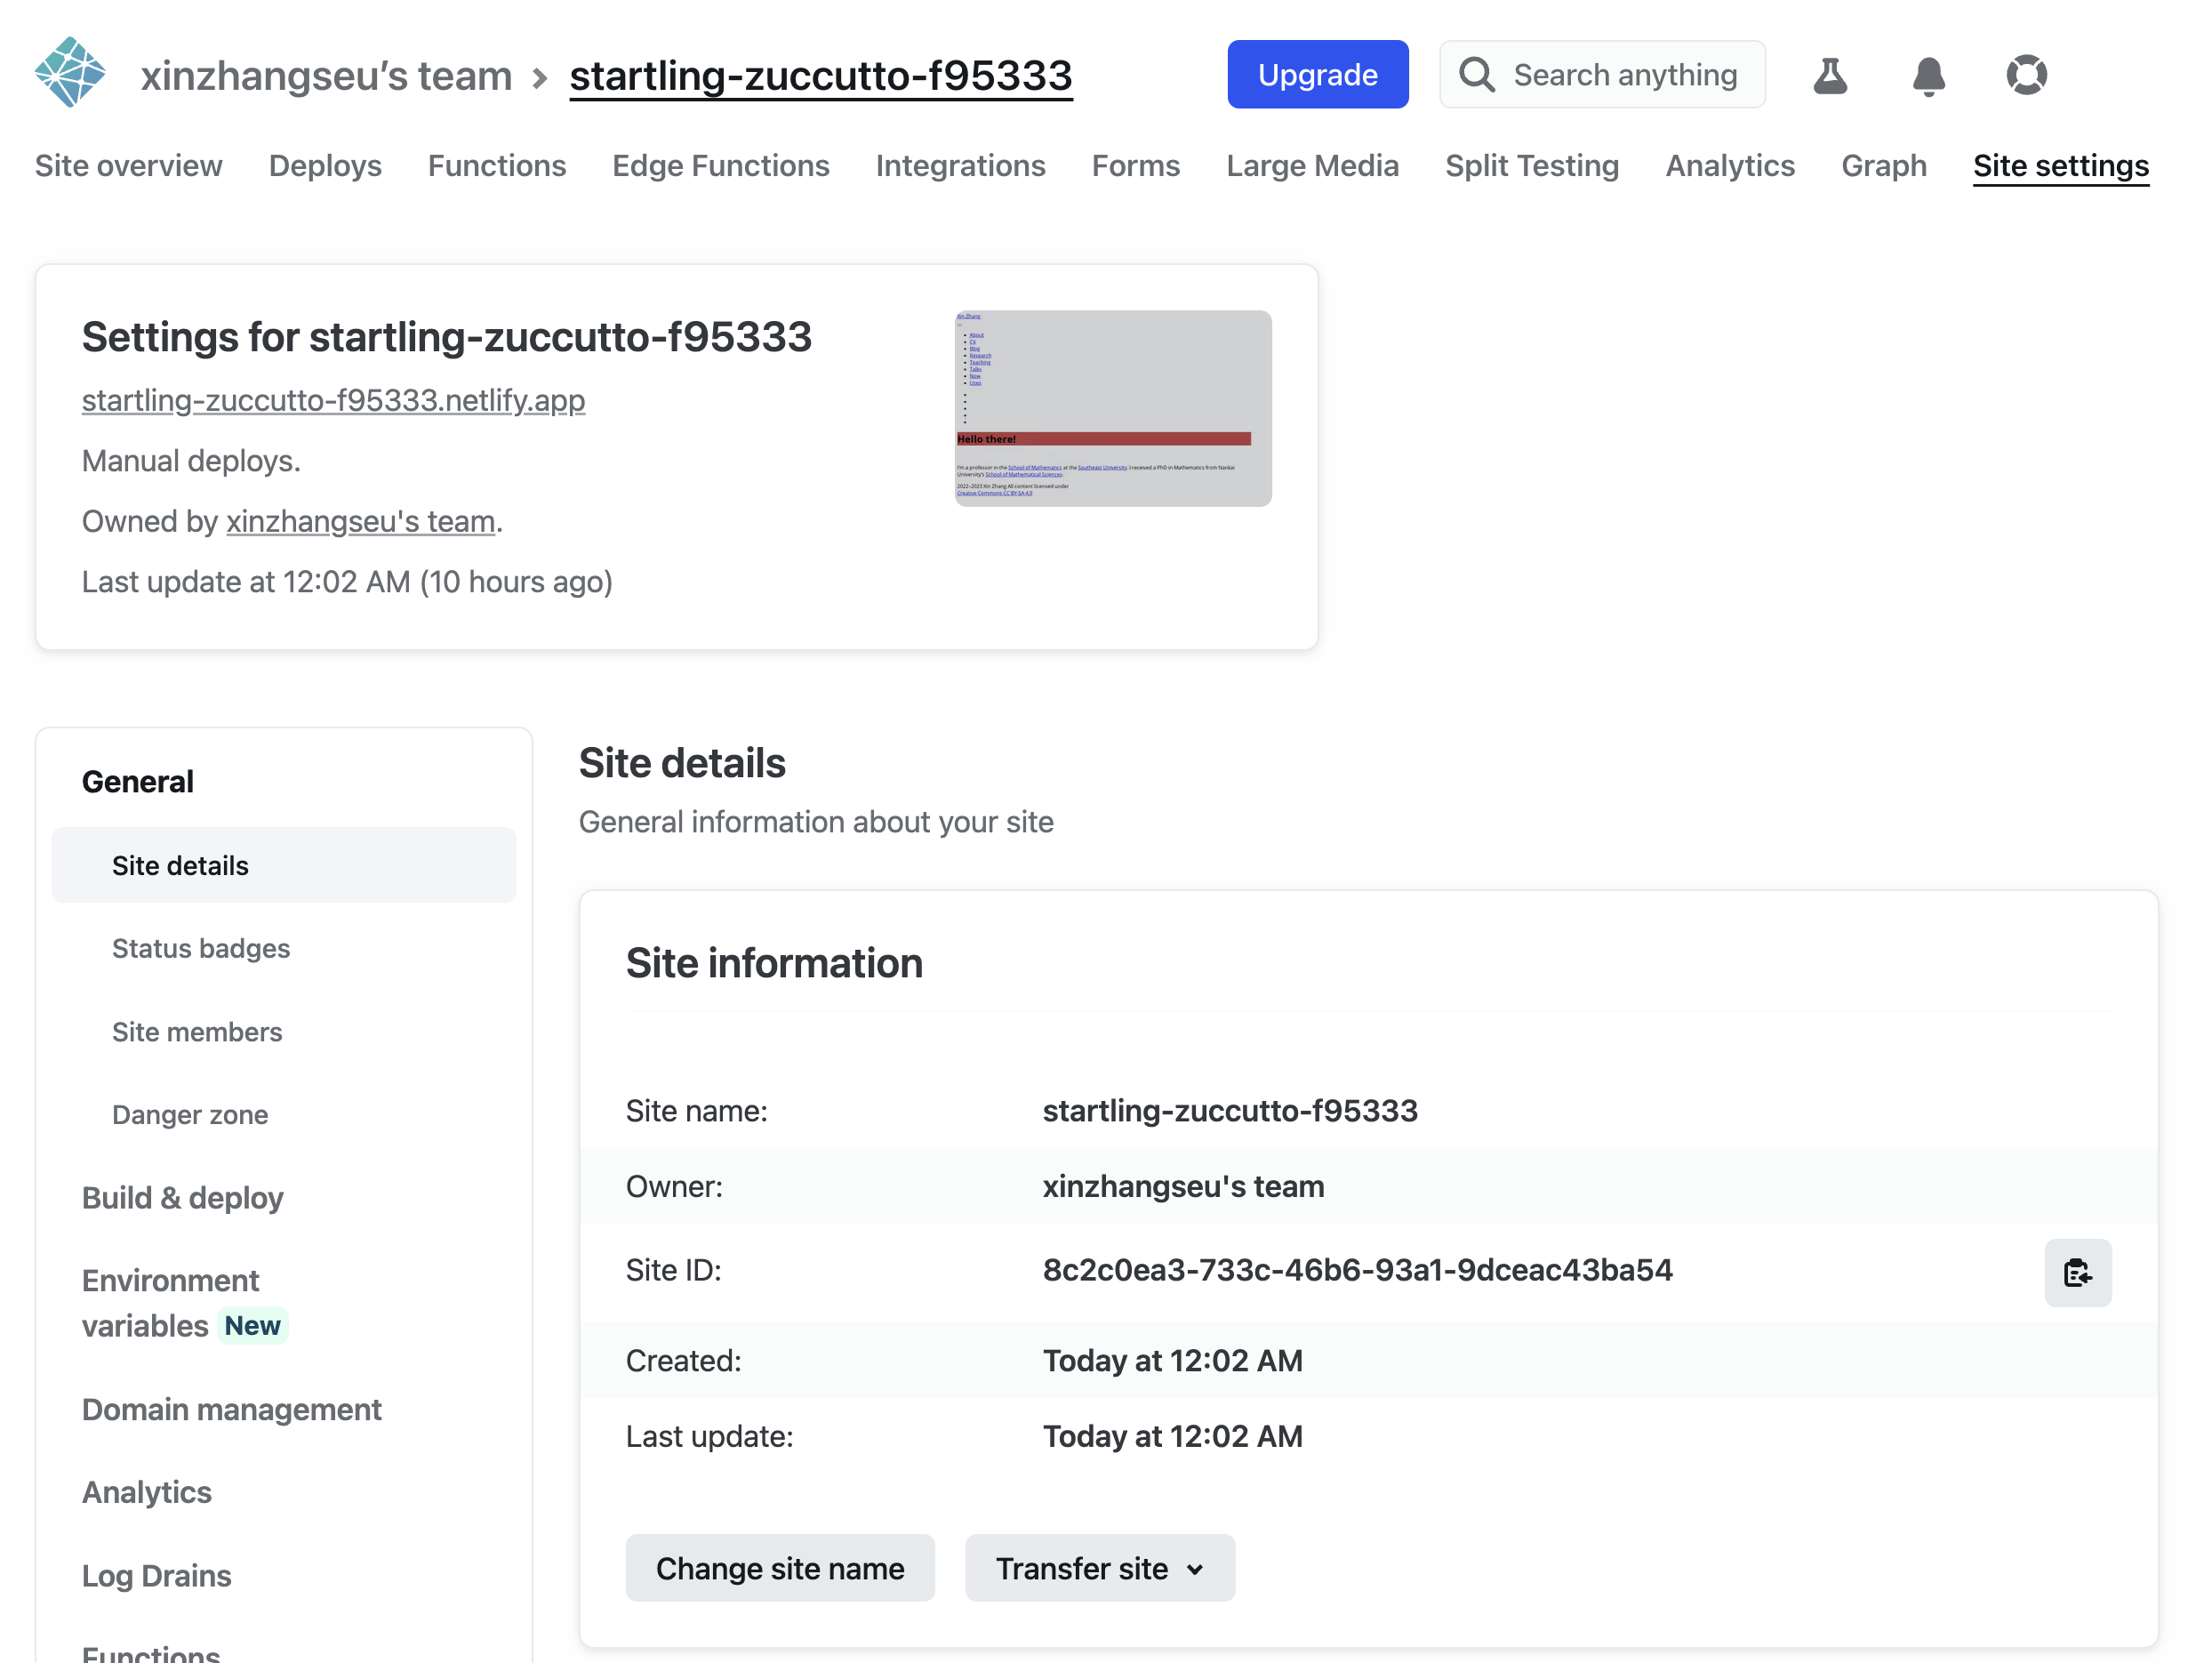
注意,系统自动生成的 Site name 较长,可以点击上图中的 Change site name 自行设置喜欢的 Site name。
第三步
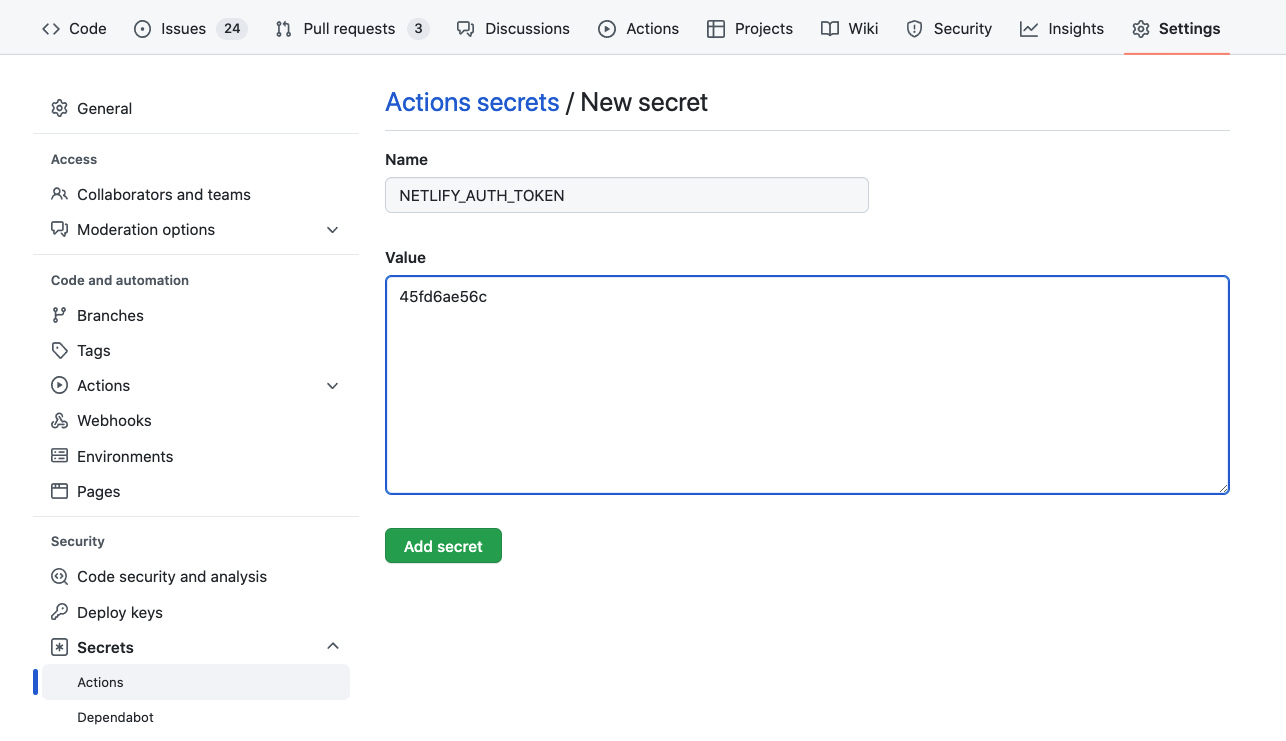
添加这两个 Netlify 凭据到 GitHub Repo 的 secrets 中。
在 GitHub 中点击准备发布到 Netlify 的仓库(repository)> Settings > Secrets and variables > Actions。

点击如上图所示的 New repository secret,在 Name 栏输入 NETLIFY_AUTH_TOKEN, Value 栏输入上一步生成的 NETLIFY_AUTH_TOKEN 值。
第四步
在本地项目仓库添加文件 _publish.yml,文件内容如下:
- source: project
  netlify:
    - id: "Netlify Site id"
      url: "https://Netlify Site name.netlify.app"
上述文件中的 “Netlify Site id”,“Netlify Site name” 可从第二步中的 Site information 中获取。
第五步
设置 GitHub Actions。在本地项目仓库新建文件夹 .github/workflows/ 并在此文件夹中新建文件 publish.yml,其内容如下:
on:
  workflow_dispatch:
  schedule:
    # 每周四 早上 7 点
    - cron: '0 23 * * 3'
  push:
    branches: main

name: Quarto Publish to Netlify

jobs:
  build-deploy:
    runs-on: ubuntu-latest
    env:
      GITHUB_PAT: ${{ secrets.GITHUB_TOKEN }}
      DISPLAY: ':99.0'
      RGL_USE_NULL: true
      LANG: "en_US.UTF-8"
      TZ: "Asia/Shanghai"
      ## RETICULATE_PYTHON_ENV: "/opt/.virtualenvs/r-tensorflow"
      ## CMDSTAN_VERSION: "2.29.2"
      ## CMDSTAN: "/opt/cmdstan/cmdstan-2.29.2"
      ## CMDSTANR_NO_VER_CHECK: true
    steps:
      - name: Check out repository
        uses: actions/checkout@v3

      - name: Setup Pandoc
        uses: r-lib/actions/setup-pandoc@v2
        with:
          pandoc-version: '2.19.2'

      - name: Set up Quarto
        uses: quarto-dev/quarto-actions/setup@v2

      - uses: r-lib/actions/setup-r@v2
        with:
          use-public-rspm: true
          r-version: '4.2.2'
          extra-repositories: 'https://mc-stan.org/r-packages'

      - uses: r-lib/actions/setup-r-dependencies@v2
        with:
          packages:
            any::knitr
            any::rmarkdown
            any::downlit
            any::xml2

      - name: Render and Publish
        uses: quarto-dev/quarto-actions/publish@v2
        with:
          target: netlify
          NETLIFY_AUTH_TOKEN: ${{ secrets.NETLIFY_AUTH_TOKEN }}
第六步
将本地仓库推送至 GitHub 远程仓库,从命令行进入 Git 项目目录,并执行
$ git add _publish_yml .github/
$ git commit -m "注释内容"
$ git push origin main
1.3.3 Quarto Books 设置
- _quarto.yml 文件内容
project:
  type: book
  output-dir: _book
  resources: elegantbook.cls
  ## 由于生成pdf需要elegantbook 宏包,但该宏包不在 TexLive 仓库中。故将elegantbook.cls文件添加至项目并在此处加resources,可以保证在github action中进行quarto render能够正常进行。
lang: zh
book:
  title: "书名"
  author: "作者"
  date: "1/8/2023"
  chapters:
    - index.qmd
    - MacSettings.qmd
    - Routers.qmd
    - summary.qmd
    - references.qmd
  search: true
  downloads: [pdf]
  page-navigation: true
bibliography: references.bib
format:
  html:
    theme: cosmo
    crossref:
      chapters: true
      eq-prefix: ""
  pdf:
    documentclass: elegantbook
    classoption: [lang=cn,10pt]
    keep-tex: true
    include-in-header:
      text: |
        \usepackage{makeidx}
        \makeindex
    include-after-body:
      text: |
        \printindex
    colorlinks: true
    link-citations: true
    crossref:
      chapters: true
      eq-prefix: ""
editor: visual
安装 R 相依包的 DESCRIPTION 文件内容
DESCRIPTION
Type: Book
Package: daar
Title: Mac Soft Setting.
Version: 0.01
Authors@R: c(
    person("Xin", "Zhang", , "x.zhang.seu@gmail.com", role = c("aut", "cre"))
  )
URL: https://https://macsoftset.netlify.app/,
     https://github.com/xinzhangseu/macsoftset/,
Depends:
    R (>= 4.2.0)
Imports:
    bayesplot (>= 1.10.0),
    beanplot,
    biscale (>= 1.0.0),
    broom,
    cartogram,
    cmdstanr (>= 0.5.3),
    data.table,
    datasauRus,
    downlit,
    dplyr,
    echarts4r,
    emo,
    emojifont,
    ganttrify,
    geodata (>= 0.4.13),
    geofacet,
    geomtextpath,
    gifski,
    ggalluvial,
    gganimate,
    ggbeeswarm,
    ggbump,
    ggChernoff,
    ggdensity,
    ggeffects,
    ggExtra,
    ggforce,
    ggmosaic,
    ggnewscale,
    ggplot2 (>= 3.4.0),
    ggradar,
    ggraph (>= 2.1.0),
    ggrepel,
    ggridges,
    ggsignif,
    ggstats,
    ggTimeSeries,
    ggVennDiagram,
    ggwordcloud,
    glmnet,
    gt (>= 0.8.0),
    HistData,
    keras,
    knitr,
    latex2exp,
    latticeExtra,
    likert,
    lme4,
    lvplot (>= 0.2.1),
    magick,
    pals,
    patchwork,
    pdftools,
    plot3D,
    plotly (>= 4.10.1),
    purrr (>= 1.0.0),
    quarto,
    ragg,
    reticulate,
    rgl,
    rootSolve,
    scatterplot3d,
    sf (>= 1.0.9),
    showtext,
    spatstat.explore (>= 3.0.0),
    spatstat.geom (>= 3.0.0),
    stars (>= 0.6.0),
    statebins,
    tensorflow,
    terra (>= 1.6-41),
    tidycensus,
    tidygraph,
    tidyterra (>= 0.3.1),
    titanic,
    tikzDevice,
    treemapify,
    vcd,
    vioplot,
    webshot2,
    xml2
Remotes:
    davidsjoberg/ggbump,
    giocomai/ganttrify,
    hadley/emo,
    corybrunson/ggalluvial,
    ricardo-bion/ggradar,
    jbryer/likert
Suggests:
    rsconnect
Additional_repositories: https://mc-stan.org/r-packages/
Encoding: UTF-8
License: CC NC ND 4.0- TexLive 宏包文件:texlive.txt
animate
appendixnumberbeamer
arev
awesomebox
bookmark
cancel
caption
carlito
cm-super
colortbl
ctex
datatool
dejavu
doublestroke
draftwatermark
dvipng
ebgaramond
ebgaramond-maths
environ
epstopdf-pkg
etex-pkg
everypage
everysel
fancyhdr
filehook
fira
fontaxes
fontawesome5
grfext
helvetic
hyphen-german
iitem
jknapltx
koma-script
listings
lm-math
makeindex
marginfix
mathdesign
mdwtools
media9
metalogo
microtype
ms
multirow
ncntrsbk
needspace
newtx
nimbus15
oberdiek
ocgx2
oldstandard
opensans
pgf
pgfornament
pgfornament-han
pgfopts
pgfplots
preview
psnfss
ragged2e
realscripts
relsize
rsfs
savesym
setspace
smartdiagram
soul
sourcecodepro
sourcesanspro
sourceserifpro
standalone
subfig
tabu
tcolorbox
textpos
threeparttable
threeparttablex
tikz-network
titlepic
titlesec
tocbibind
tocloft
trimspaces
tufte-latex
type1cm
ucs
ulem
unicode-math
varwidth
xcolor
xecjk
xltxtra
xpatch
xstring
zhnumber
zref- GitHub Action 配置
on:
  workflow_dispatch:
  schedule:
    # 每周四 早上 7 点
    - cron: '0 23 * * 3'
  #push:
    #branches: main
  #pull_request:
    #branches: main
name: Quarto Publish to Netlify
env:
  isExtPR: ${{ github.event.pull_request.head.repo.fork == true }}
  RUST_BACKTRACE: 1

jobs:
  build-deploy:
    if: "!contains(github.event.head_commit.message, '[docker]')"
    runs-on: ubuntu-22.04
    env:
      GITHUB_PAT: ${{ secrets.GITHUB_TOKEN }}
      DISPLAY: ':99.0'
      RGL_USE_NULL: true
      LANG: "en_US.UTF-8"
      TZ: "Asia/Shanghai"
      RETICULATE_PYTHON_ENV: "/opt/.virtualenvs/r-tensorflow"
      CMDSTAN_VERSION: "2.29.2"
      CMDSTAN: "/opt/cmdstan/cmdstan-2.29.2"
      CMDSTANR_NO_VER_CHECK: true
    steps:
      - uses: actions/checkout@v3
      - uses: r-lib/actions/setup-pandoc@v2
        with:
          pandoc-version: '2.19.2'

      - name: Install Quarto
        uses: quarto-dev/quarto-actions/setup@v2
        with:
          version: 1.2.280
      - run: |
          quarto --version
          quarto pandoc --version
          pandoc --version

      - name: Install TinyTeX
        uses: r-lib/actions/setup-tinytex@v2
        env:
          # install full prebuilt version
          TINYTEX_INSTALLER: TinyTeX

      - uses: r-lib/actions/setup-r@v2
        with:
          use-public-rspm: true
          r-version: '4.2.2'
          extra-repositories: 'https://mc-stan.org/r-packages'

      # based on the renv lockfile file
      # - uses: r-lib/actions/setup-renv@v2
      # based on the DESCRIPTION file
      - uses: r-lib/actions/setup-r-dependencies@v2
        with:
          needs: book

      - name: Install Fonts From System
        run: |
          sudo apt-get install -y fonts-noto-core fonts-noto-cjk fonts-noto-color-emoji
          fc-list | grep 'noto' | sort
          fc-list | sort
          fc-cache -fsv

      - name: Install LaTeX packages
        run: |
          if(!require('tinytex')) install.packages('tinytex')
          tinytex::tlmgr_install(readLines("texlive.txt"))
        shell: Rscript {0}

      - name: Check TikZ
        run: |
          if(!require('tikzDevice')) install.packages('tikzDevice')
          tikzDevice::tikzTest()
        shell: Rscript {0}

      - name: Check R and xvfb
        run: |
          xvfb-run Rscript -e 'capabilities()'

      - name: Render book to all format
        # Add any command line argument needed
        run: |
          make all

      - name: Render and Publish
        uses: quarto-dev/quarto-actions/publish@v2
        with:
          target: netlify
          NETLIFY_AUTH_TOKEN: ${{ secrets.NETLIFY_AUTH_TOKEN }}
1.3.4 Mac Port install log
To use this bootstrap version of cmake instead of the usual cmake port, add
    the following lines to the Portfile:

    depends_build-replace  path:bin/cmake:cmake port:cmake-bootstrap
    configure.cmd          ${prefix}/libexec/cmake-bootstrap/bin/cmake
  gawk has the following notes:
    readline support has been removed from gawk. If you need to run gawk
    interactively, install rlwrap:

    sudo port install rlwrap

    and run gawk using rlwrap:

    rlwrap gawk ...
  libomp has the following notes:
    To use this OpenMP library:
     * For clang-3.8+, or clang-3.7 with +openmp variant:
        add "-fopenmp" during compilation / linking.
     * For clang-3.7 without +openmp variant, use:
        "-I/opt/local/include/libomp -L/opt/local/lib/libomp -fopenmp"
  libpsl has the following notes:
    libpsl API documentation is provided by the port 'libpsl-docs'.
  py310-cython has the following notes:
    To make the Python 3.10 version of Cython the one that is run when you
    execute the commands without a version suffix, e.g. 'cython', run:

    port select --set cython cython310
  py310-pygments has the following notes:
    To make the Python 3.10 version of Pygments the one that is run when you
    execute the commands without a version suffix, e.g. 'pygmentize', run:

    port select --set pygments py310-pygments
  python310 has the following notes:
    To make this the default Python or Python 3 (i.e., the version run by the
    'python' or 'python3' commands), run one or both of:

        sudo port select --set python python310
        sudo port select --set python3 python310
  python311 has the following notes:
    To make this the default Python or Python 3 (i.e., the version run by the
    'python' or 'python3' commands), run one or both of:

        sudo port select --set python python311
        sudo port select --set python3 python311